SDS Reporter Versions 1.101.0.71 and below
The purpose of a template is to save the users time by filling in some of the more generic survey data. For example, the user could create a template for one customer, including company name, TC type, etc; then when the survey is run using this template, this information is already present and it won’t need to be entered for each survey run for that customer. The SDS Template Manager (figure 3.1) allows the user to see all of the templates currently stored on the SDS instrument, as well as any templates saved to a local computer. The Template Manager also allows the user to create new templates and save them to a local file on a computer or network, or to the SDS instrument.
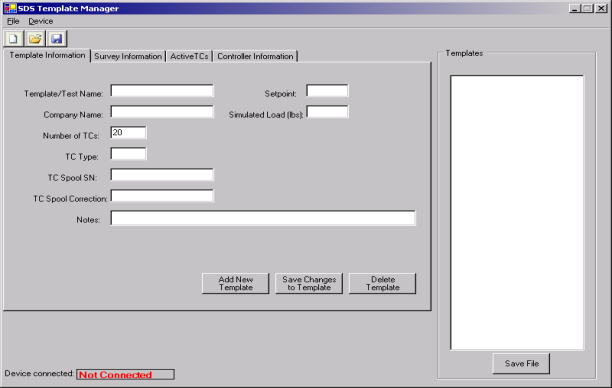
Figure 3.1 SDS Template Manager
Description/Function of Template Manager Screen buttons/menu options
This section will describe the function of the toolbar buttons and menu options for the Template Manager Screen. Clicking on either the form button or the menu option will produce the same result, so each pair of button/menu option will be explained in this section.
New Button / File è New
The New button,  , or New menu option will allow the user to create a new set of templates. The maximum number of templates that can be added per file is 32. Note: initially, there are zero (0) templates. The SDS software does not create 32 blank templates. When the New Button is clicked or the New menu option is clicked, the tabs that contain all of the fields for the template will become visible, as well as the Templates list. Creating a new template file will also enable the Save menu option and the Save As menu option. Using the keyboard shortcut Ctrl + N will also create a new set of templates.
Open Button / File è Open
The Open button,  , or the Open menu option will allow the user to open an existing template file either from the local computer, or from an SDS instrument on the network. Note: Before clicking “Open”, the user must first select the device to open from the Device menu option (“Local File” or “SDS Instrument”) (figure 3.2).
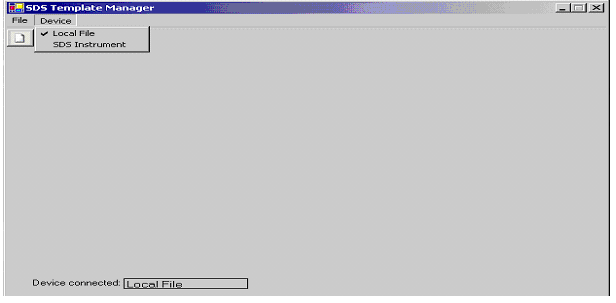
Figure 3.2 Device menu option
Once selected, the chosen device will have a check mark next to it on the Device menu option. The “Device connected:” label at the bottom of the Template Manager screen will also show what device the user is connected to (either “Local File” or “SDS Instrument”). When the user is not connected, this label will show “Not Connected”. If the user tries to open a file without selecting a device first, the SDS software will display a “No Device Type Chosen” message (figure 3.3).
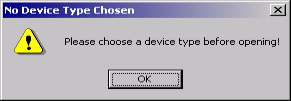
Figure 3.3 No Device Type Chosen message
If the user selects a local file, the SDS software will display a common Windows dialog box for the user to select which file to open. If the user selects an SDS instrument, the SDS Software will display a selection box with all of the available SDS instruments on the network (figure 3.4). Note: Since the SDS software is searching the network for all SDS devices, it may take a couple of minutes for the selection box to be displayed.

Figure 3.4 SDS Instrument selection box
While the SDS software is searching the network for SDS devices, it will display a progress box, which will detail the progress of the search (figure 3.5).

Figure 3.5 SDS software progress box
When the software is finished searching, the progress box will close automatically. When the Open Button or the Open menu option is clicked, the tabs that contain all of the fields for the template will become visible. Opening an existing file will also enable the Save menu option and the Save As menu option. Using the keyboard shortcut Ctrl + O will also open an existing file. Once the file has been loaded, the filename will be listed above the Templates list on the right of the form (figure 3.1).
Save Buttons / File è Save
The Save button,  , Save File button, or Save menu option will allow the user to save the current file back to the local machine or the SDS instrument, depending on which device was selected. Note: this option will only save the entire file back; it will not save changes to individual templates. Any changes to the individual templates that have not been saved will not be saved. See the section “Save Changes to Template Button” to find out how to save changes to individual templates. If the user selects an SDS instrument, the SDS software will display a progress box (figure 3.5). When the save has completed, the SDS software will close the progress box. Once the file has been saved, the filename will be listed above the Templates list on the right of the form (figure 3.1).
File è Save As
This option acts the same way as the Save option, only it will display a dialog box or SDS selection box (depending on the device selected) that will allow the user to select the file to save. If the user selects “Local File” as the device, the SDS software will display a common Windows dialog box. Clicking “Cancel” will cancel the save. If the user selects a file that already exists and clicks “Save”, the SDS software will prompt the user for overwrite confirmation (figure 3.6). Clicking “No” will close the confirmation box without saving and return the user to the Save As dialog box. Clicking “Yes” will save the file.
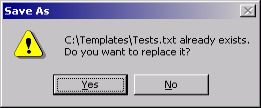
Figure 3.6 Overwrite confirmation
If the user types in a filename that does not exist and clicks “Save”, the SDS software will prompt the user for creation confirmation (figure 3.7). Clicking “No” will close the confirmation box without saving and return the user to the Save As dialog box. Clicking “Yes” will save the file.

Figure 3.7 Creation of a file confirmation
If the user selects an SDS instrument, the SDS software will display a progress box (figure 3.5). When the save has completed, the SDS software will close the progress box. Once the file has been saved, the filename will be listed above the Templates list on the right of the form (figure 3.1).
Exit Button / File è Exit
This option will close the Template Manager screen.
The following buttons are located on the “Template Information” tab, “Survey Information” tab, “Active TCs” tab, and the “Controller Information” tab, and deal specifically with individual templates, not the template file as a whole. Clicking on these buttons will not affect the template file.
Add New Template Button
This option will add a template to the collection of templates stored in memory, up to 32 total templates. The only required field is the Template Name. If the user attempts to create a template without providing a template name, the SDS software will display a No Template Name error message (figure 3.8).

Figure 3.8 No Template Name error message
The Setpoint field may be left blank or filled in with a numeric number up to 4 digits long. If the user does enter non-numeric text, the SDS software will display a Setpoint Not Numeric error message (figure 3.9).
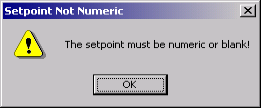
Figure 3.9 Setpoint Not Numeric error message
Once a template has been added, the first template will be loaded into the fields.
Save Changes to Template Button
This option will save the changes made to a specific template back to the template collection stored in memory. A valid template must be selected from the “Templates” list to the right of the “Template Information” tab (figure 3.10). Note: this will only save changes to 1 template at a time and it will not save changes to the template file. Use the Save buttons or menu options to save the file. Once the template has been saved, the first template will be loaded into the fields.

Figure 3.10 Templates drop-down list
If a valid template is not chosen, the SDS software will display a No Template Selected error message (figure 3.11).
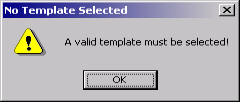
Figure 3.11 No Template Selected error message
Delete Template Button
This option will delete a template from the collection of 32 templates stored in memory. Note: the first template cannot be deleted. If the user attempts to delete the first template, the SDS software will display an error message (figure 3.12).

Figure 3.12 Unable to Delete First Template message
Once the user clicks on the “Delete Template” Button, the SDS software will display a message confirming the delete (figure 3.13).

Figure 3.13 Confirm delete message
Clicking on “No” will cancel the delete. Clicking on “Yes” will delete the template. After the deletion has occurred, it will not be necessary to click the “Save Changes to Template” button.