Sensor Calibration
On the MGA 6010, you can perform a sensor calibration with one of four calibration sources. These sources are displayed when Sensor Calibration is first selected: Automatic Calibration Port, Auxiliary Calibration Port, Sample Line (with pump on), and Sample Line (with pump off).
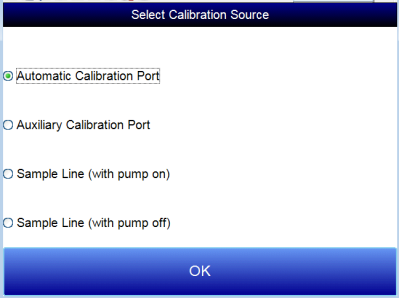
You will be required to select one of the four sources.
With the Automatic Calibration Port, calibration is performed using the Zero Calibration Gas Inlet and Span Calibration Gas Inlet ports on the side of the unit.
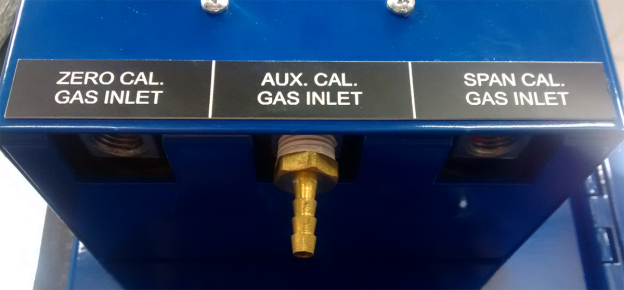
Gas Inlet Ports for Automatic Calibration
The Auxiliary Calibration Port makes use of the Auxiliary Calibration Gas Inlet, located on the side of the unit and in the middle of the gas inlets for Zero Calibration and Span Calibration. A single gas line is run to the Auxiliary Calibration Gas Inlet port for zero and span calibration.

Gas Inlet Port for Auxiliary Calibration
Calibration with a Sample Line makes use of the Sample Inlet Port located on the side of the unit opposite the ports used for Automatic Calibration and Auxiliary Calibration. The option selected will depend on whether the pump is running [Sample Line (with pump on)] or not running [Sample Line (with pump off)].
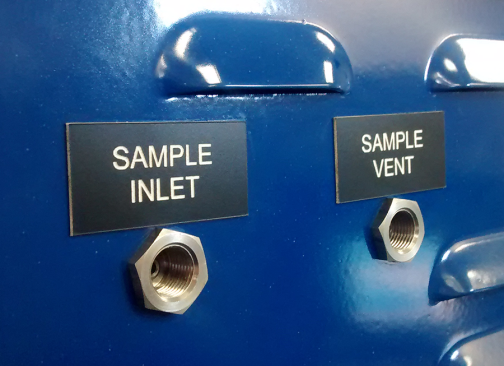
Sample Inlet Port Used for Sample Line Calibration
Once you have attached the gas line as needed and selected the desired calibration source, tap OK. A screen similar to the one shown below will be displayed.
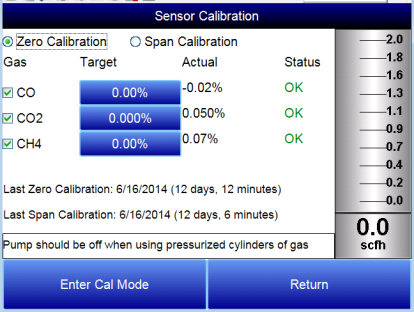
Two types of calibrations can be performed on the NDIR sensor: Zero and Span. The Zero calibration should be performed with a gas that has none of the measured gases in it. Ideally this would be pure Nitrogen or Argon. The concentration of the Span calibration gas should closely resemble the gas that is being measured. For a heat treating application measuring endothermic gas, the ideal composition would be:
-
CO: 20%
-
CO2: 0.5%
-
CH4: 5.0%
-
H2: 40%
-
N2: Balance
Since the accuracy of the calibration gas directly influences the resulting accuracy of the instrument, the highest possible accuracy grade should be obtained. Some gas suppliers refer to this as a “Certified Primary Standard”. The high degree of accuracy is not required to obtain nominal values that exactly match the values shown above. The accuracy is required to know the exact composition of the gas in the cylinder. The actual composition will be shown on the bottle when it is delivered.
When flowing calibration gas is into the analyzer, turn the pump off. The amount of flow from the gas cylinder should be approximately 1.5 SCFH at no pressure. The gas cylinders will be under high pressure, so it is recommended that a two stage regulator with a low pressure secondary stage be used. It is good practice to begin the flow of gas before attaching the calibration gas to the instrument. This will prevent any high pressure bursts from entering the instrument.
Calibration gases can be obtained from Super Systems, however they can also be obtained from any supplier of custom gases.
Hydrogen Cell Note:
It is recommended that the instrument be turned on for three hours prior to performing an H2 calibration.