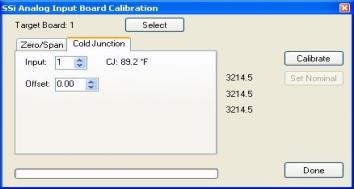
Cold Junction Offset
The second step in the calibration process is setting the cold junction offset. If necessary, select a board to calibrate by clicking on the Select button. This will display a drop-down list that the user can select the board to calibrate. This list will only display the available boards to calibrate. Select the board’s input to apply the cold junction offset to by using the up and down arrows. Select the appropriate offset to use by using the up and down arrows. This can range from -25.00 to 25.00. Note – To subtract a value from the current cold junction value, be sure to set the offset value as a minus value by clicking on the plus/minus key on the keypad (+/-). The overall Cold Junction value is modified by adding or subtracting a value to the current value. Press the Calibrate button to begin the calibration process.
Press the Done button to close out the screen.
