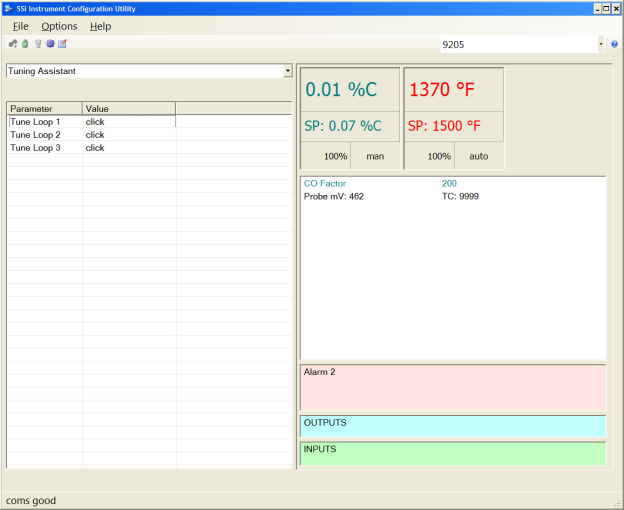
Tuning Assistant
The tuning assistant will allow the user to automatically generate the PID settings for a specific loop. Click on the “click” value to start the tuning assistant. Note: It is recommended to change the temperature setpoint immediately prior to initiating an auto tune. The tuning assistant will begin tuning once there is a 10% range difference between the actual temperature and the setpoint.

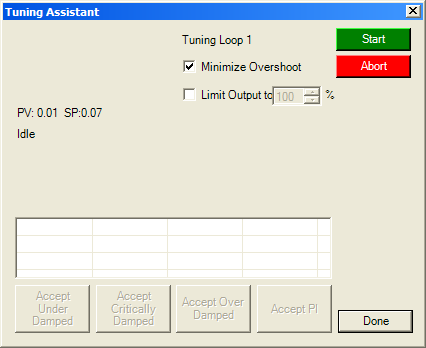
The user can select the loop to tune from the Tuning Assistant. Loop 1 is the primary temperature loop; Loops 2 and 3 can be tuned if necessary. When you select “click” to open the Tuning Assistant, you will see which loop you are tuning as well as the PV and SP. When "Minimize Overshoot" is checked the Tuning Assistant will suggest more conservative PID values in an effort to control overshoot. The “Limit Output to x%” checkbox allows you to set a maximum output percentage; this feature is useful when output may need to be limited due to physical characteristics of the furnace.
Click on the Start button to begin the auto tune process. NOTE: The process may take up to 30 seconds to start depending on the difference between actual temperature and setpoint not being within 10%. Once the process has started, the “Idle” line will change to “Tuning: Pointer xx”. This means that the tuning process is working. During the tuning, the temperature will oscillate around the setpoint 3 times before Tuning Assistant suggests tuning parameters. Depending on the heating and cooling abilities of the equipment, this can take a few minutes up to a few hours. When the tuning is finished, the “Tuning: Pointer xx” line will read “Idle” again, and the list underneath will be populated with suggested PID settings. NOTE: Clicking on the Done button while the tuning is in progress will close down the screen, but the user will have to confirm the action. However, clicking on the Abort button will simply abort the calibration process.
Each column for the PID settings relates to the button below. For example, the second column is the PID settings for the Critically Damped values. The user can accept only one set of numbers. To select a set of values, click on the corresponding button. For example, to accept the critically damped values, click on the Accept Critically Damped button.
The under damped values will reach the setpoint faster, but there will be more overshoot involved. The over damped values will work to minimize the overshoot, but it will be slower than the under damped values. The critically damped values are considered the “optimum” values because they are a balance between the under damped and over damped values with regards to time and overshoot. The PI values are just the proportional band and the reset value (the P and the I from PID). This could be applicable in an atmosphere loop, where the rate will not have much effect.

Once a set of values has been accepted, the user can press the Done button to exit the screen. The accepted values can be viewed on the PID Loop Setup menu option. In future tuning sessions, the most recent tuning parameters will be retained and adjusted PID sets will be offered.