User Calibration
Click on the “click” value next to the “User Calibration” field to start the user calibration. The Calibration screen will be displayed. For complete calibration of Analog Inputs start with Zero and Span Input 1 Calibration, not Cold Junction Calibration. The user calibration will calibrate the following items:
Cold Junction
Zero/Span Input 1
Zero/Span Input 2
Zero/Span Input 3
Zero/Span Output 1
Zero/Span Output 2
Note – On the zero/span input screens, the range listed next to the input will depend on the input type set up in the Analog Input Setup menu option.

Cold Junction Calibration.
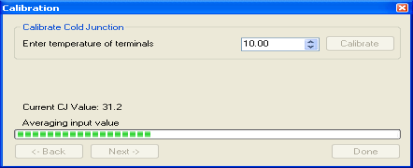
If adjusting the input by a preset amount for all temperature points please calibrate the cold junction by entering a new value plus or minus the difference of the value indicated. Wait 120 seconds and verify with a source calibration device with the correct T/C type. In the “Calibrate Cold Junction” section, enter the temperature of the terminals and click on the Calibrate button. This will calibrate the cold junction value. Note: During a normal calibration procedure, the user should zero and span all of the inputs first and then perform a cold junction calibration, if necessary.
Zero/Span Inputs Calibration.
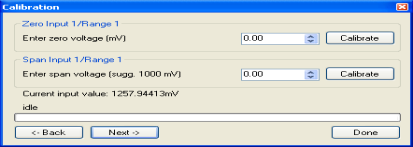
Clicking on the Next -> button will display the second screen (zero/span calibration) for the user calibration begin here for only calibrating the inputs terminals 27-32. (cold junction will be completed as a final step).

In the “Zero Input 1/Range X” section, enter the zero voltage and click on the Calibrate button. This will calibrate the zero range.
In the “Span Input 1/Range X” section, enter the span voltage that you are sourcing in and click on the Calibrate button. This will calibrate the span range.
Clicking on the Next -> button will display the third screen for the user calibration – Zero/Span input 2. Clicking on the <- Back button will display the previous screen.
Calibrate the zero/span range for input 2 and click on the Next -> button to continue to the fourth screen – Zero/Span for input 3. Clicking on the <- Back button will display the previous screen.
Calibrate the zero/span range for input 3 and click on the Next -> button to continue to the fifth screen – Zero/Span Output 1. Clicking on the <- Back button will display the previous screen.

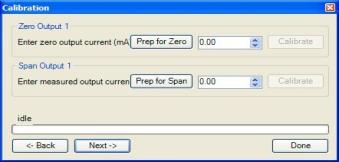
To calibrate the zero/span range for output 1, you must first attach your measuring device, then select Prep for Zero. Let the unit output what it has set for the zero measurement, then enter what you are measuring coming out of the terminals. Once entered select Calibrate and let the procedure finish. This will be the same for the Span output. Then click on the Next -> button to continue to the sixth screen – Zero/Span Output 2. Clicking on the <- Back button will display the previous screen.
Calibrate the zero/span range for output 2 following the same procedure as before with output 1. Clicking on the <- Back button will display the previous screen. This is the last screen for user calibration. Click on the Done button to close the screen down, or return to the first screen for cold junction calibration.